Quick Guide for EdrawMind
Looking for some help? Here you can get quick answers and step-by-step instructions on how to use EdrawMind.
EdrawMind Guide
-
Get Started with EdrawMind
-
Quick Using EdrawMind
-
Learn to Use Topics
-
Insert/Add Elements
-
Theme and Style
-
AI & OCR
-
Presentation
-
Advanced Features
-
View Mind Map
-
Shortcut Keys
-
Andriod App Guide
-
iOS APP Guide
-
Online Collaboration
-
Video Tutorial
Print a Mind Map
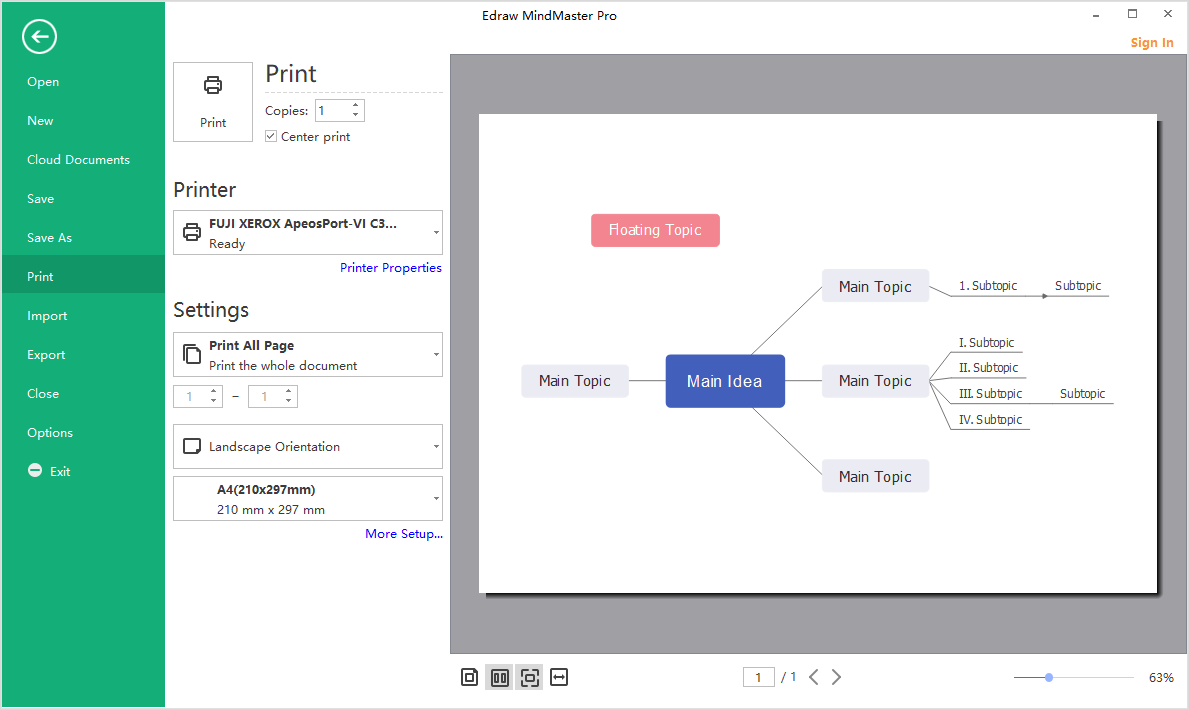
Go to File > Print and see the print preview interface. By default, the copy number is 1 and you can choose printers or check printer status in Printer Properties.

Print Settings
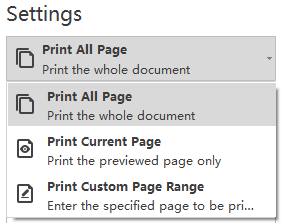
To decide which page(s) in your mind map will be printed, click the first box to choose the corresponding option. When you want custom print, don’t forget to type specific page numbers.

You can change page orientation between Portrait and Landscape, and change print page size.
More Print Setup
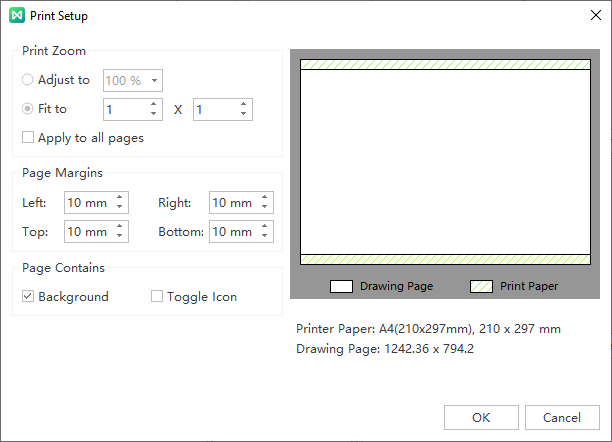
Click More Print Setup… to see whether the sizes of the drawing page and the printer paper meet your requirements. You can add grid or guideline and see the result in the preview window.

Adjust to: The percentage represents how the print size of the drawing page matches that of the print paper(s). 100% means that the drawing will be printed exactly on a paper. Less than 100% indicates that there will be extra space on the print paper that is not covered by the drawing. For more than 100%, the drawing should be divided into sections and printed by several papers.
Fit to: The numbers will decide how many sheets will be used to print the whole drawings. The left means to add printer papers horizontally, while the right is to add papers vertically.


