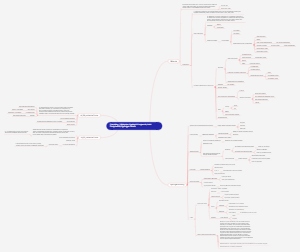
MindMap Gallery Geometric tolerance testing
This is a mind map about geometric tolerance detection. The detection of geometric tolerance needs to follow certain technical standards and specifications to ensure the accuracy and reliability of the detection results.
Edited at 2023-12-12 20:49:13El cáncer de pulmón es un tumor maligno que se origina en la mucosa bronquial o las glándulas de los pulmones. Es uno de los tumores malignos con mayor morbilidad y mortalidad y mayor amenaza para la salud y la vida humana.
La diabetes es una enfermedad crónica con hiperglucemia como signo principal. Es causada principalmente por una disminución en la secreción de insulina causada por una disfunción de las células de los islotes pancreáticos, o porque el cuerpo es insensible a la acción de la insulina (es decir, resistencia a la insulina), o ambas cosas. la glucosa en la sangre es ineficaz para ser utilizada y almacenada.
El sistema digestivo es uno de los nueve sistemas principales del cuerpo humano y es el principal responsable de la ingesta, digestión, absorción y excreción de los alimentos. Consta de dos partes principales: el tracto digestivo y las glándulas digestivas.
El cáncer de pulmón es un tumor maligno que se origina en la mucosa bronquial o las glándulas de los pulmones. Es uno de los tumores malignos con mayor morbilidad y mortalidad y mayor amenaza para la salud y la vida humana.
La diabetes es una enfermedad crónica con hiperglucemia como signo principal. Es causada principalmente por una disminución en la secreción de insulina causada por una disfunción de las células de los islotes pancreáticos, o porque el cuerpo es insensible a la acción de la insulina (es decir, resistencia a la insulina), o ambas cosas. la glucosa en la sangre es ineficaz para ser utilizada y almacenada.
El sistema digestivo es uno de los nueve sistemas principales del cuerpo humano y es el principal responsable de la ingesta, digestión, absorción y excreción de los alimentos. Consta de dos partes principales: el tracto digestivo y las glándulas digestivas.
Geometric tolerance testing
Overview
The occurrence and impact of geometric errors
produce
The process system is affected by force deformation, thermal deformation, vibration, wear and various errors in system performance, causing dimensional and geometric errors in parts.
Influence
Affects the functional requirements of the part
Accessory properties that affect parts
Affects the assembleability of parts
Geometric elements and classification of parts
Divided according to geometric structure characteristics
Component elements (outline elements)
Export features (center features)
Divided by state of existence
ideal elements
actual elements
Divided according to position in geometric tolerances
Measured elements
datum features
Divided according to functional relationship
single element
associated elements
Characteristic items and symbols for geometric tolerances
Textbook P73, Table 3-1
Shape tolerance
Form Tolerances and Tolerance Zones
Shape tolerance
Shape tolerances are used to limit the shape errors of the parts themselves. Shape tolerances include straightness, flatness, roundness, cylindricity, line profile and surface profile.
Current Tolerance Zone
The shape tolerance zone is an area that limits changes in actual factors. Parts must actually be qualified within this area. For details, see Table 3-2 on page P74 of the textbook.
Assessment Principles of Shape Tolerance
The national standard stipulates that the minimum condition (minimum area fitting criterion) is the basic principle for evaluating shape errors.
Orientation, position and runout tolerances
Benchmarks and classifications
The datum plays a role in determining the direction or positioning of the measured element in the direction and position runout tolerance. It is also an important basis for determining the azimuth position and the direction of the runout tolerance zone.
Classification
single benchmark
Combined Benchmark (Public Benchmark)
Benchmark system (three-basis system)
Directional tolerance and tolerance zone
Directional tolerance can be defined as the total amount of change allowed in the direction of the associated elements relative to the datum. Directional tolerance includes parallelism. This system inclination has directional requirements for line contours and surface contours.
The directional tolerance zone has a certain direction relative to the datum and has the function of comprehensively controlling the direction error and shape error of the measured element. For details, see Table 3-3 on page P79 of the textbook.
Position tolerance and tolerance zone
Position tolerance refers to the total amount of variation allowed in the position of the associated elements relative to the datum. Position tolerance includes six types: concentricity, coaxiality, symmetry, position, line profile and surface profile with position requirements.
The position tolerance zone has a definite position relative to the datum and has the function of comprehensively controlling the position, direction and shape of the measured element. For details, see Table 3-4 on P84 of the textbook
Runout tolerance and tolerance zone
Circular runout tolerance
Measured elements: cylindrical surface, conical surface and end surface
Datum elements: axis
Circular runout tolerance: means that the measured element rotates one revolution relative to the datum element, while the probe does not move relative to the datum. The difference between the maximum and minimum values of the indicator obtained is the maximum variation. Circular runout tolerance is divided into radial circular runout tolerance, axial circular runout tolerance and oblique circular runout tolerance.
Full runout tolerance
Measured elements: cylindrical surface and end surface
Datum elements: axis
Total runout tolerance: refers to the multiple rotations of the measured element relative to the datum element, and at the same time the probe moves relative to the datum. The difference between the maximum and minimum values of the indicator obtained is the maximum variation. The total runout tolerance is divided into radial total runout tolerance and axial total runout tolerance. For details, see Table 3-5 on P89 of the textbook
The runout tolerance has the function of comprehensively controlling the position, direction and shape of the extracted elements being measured. For example, the axial full runout tolerance can simultaneously control the perpendicularity of the end face to the reference axis and its flatness error; the radial full runout tolerance can control the coaxiality and cylindricity errors.
Tolerance principle
Commonly used terms related to tolerance principles
Extract the local dimensions of the component elements (referred to as the local dimensions of the extracted elements)
The action size of a single element (referred to as the action size)
The effect size of associated elements (referred to as the associated effect size)
Maximum entity status and maximum entity size
Minimum entity status and minimum entity size
Maximum entity effect state and maximum entity effect size
Minimum entity effect state and minimum entity effect size
Tolerance principle
principle of independence
related requirements
Inclusion requirements
Maximum Entity Requirement (MMR)
Geometric tolerance standards and regulations for unmarked geometric tolerance values
Geometric Tolerance Standards
Unmarked geometric tolerance value provisions
Selection of geometric tolerances
Selection of geometric tolerance items
Selection of geometric tolerance principles
Selection of geometric tolerance values
Selection of datum features
Annotation of geometric tolerances
tolerance grid
Labeling of measured elements
Labeling of datum features
Marking of theoretically correct dimensions
Detection of geometric errors
Detection principles of geometric errors
Testing equipment
Detection method of geometric errors