How to Make a Timeline in PowerPoint
Create Your Timeline NowTimeline is a linear representation of knowledge used in literature, history, and any other research involving the analysis of sequential components. Typically, it represents a horizontal line of time segments. Each of the elements can also have its sub-elements.
Timeline is an integral part of the project management toolkit to keep track and provide critical information efficiently. It helps you imagine dates and activities related to time and construct an easy-to-digest project or event timeline. A timeline will help you show the project schedule and prepare your teammates or collaborators effectively. This article will explore how to make a timeline in PowerPoint and suggest a more accessible alternative.

1. How To Make A Timeline in PowerPoint
To create a simple timeline in PowerPoint, there are mainly 6 steps which could be time-consuming and complex for certain freshers.
Step 1
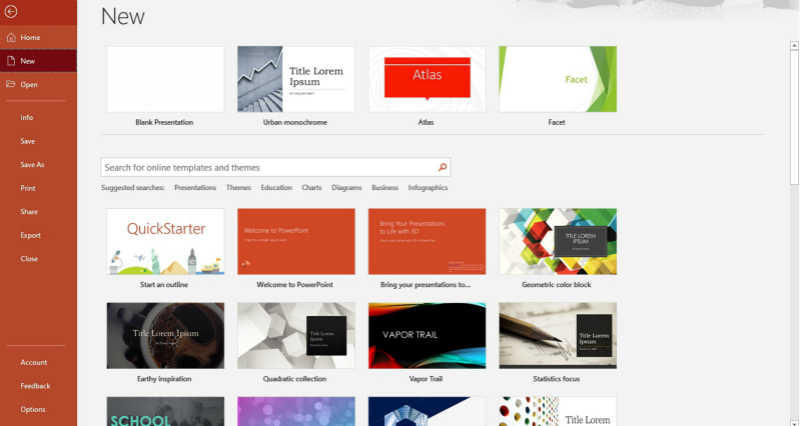
Open your PowerPoint and create a new presentation. You can open a blank layout and add your colors or use an online template.
Source: PowerPoint
Step 2
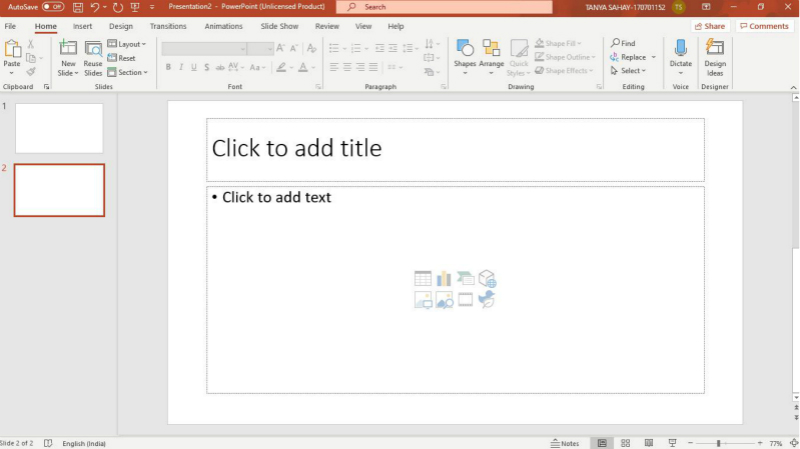
If you choose a blank presentation, you will only see the title slide when the file is opened. There are a variety of slide designs in the presentation if you select a template. Anyway, press the New Slide button in the Home menu and add a Title and Content slide.
Source: PowerPoint
Step 3
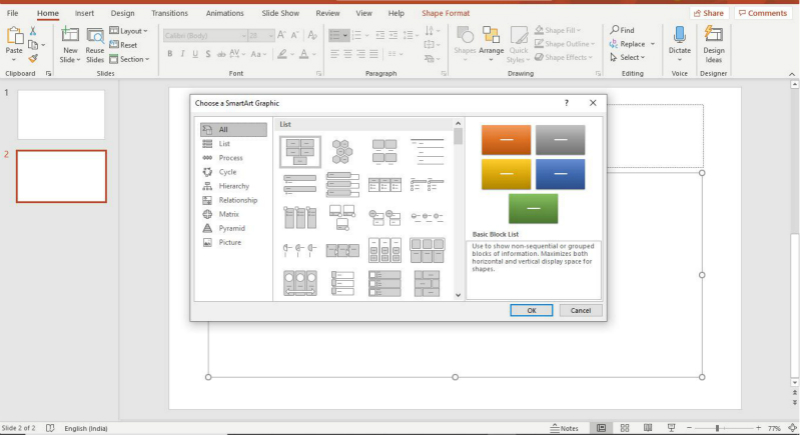
You're going to see six icons in the center of the slide. To attach a SmartArt Graphic, press the upper right-hand icon.
Source: PowerPoint
Step 4
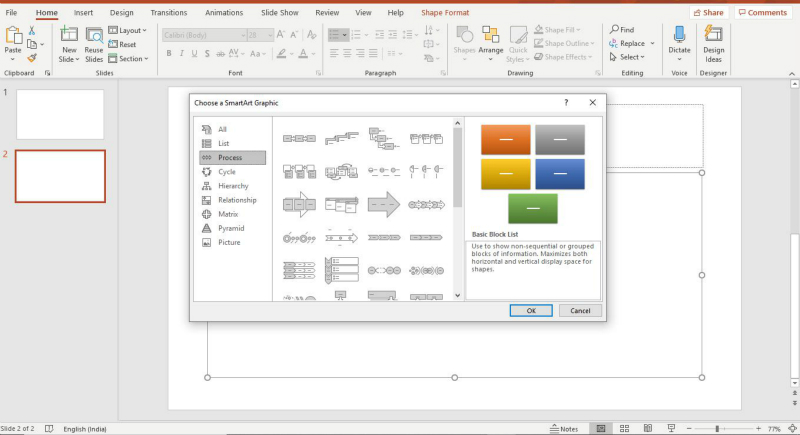
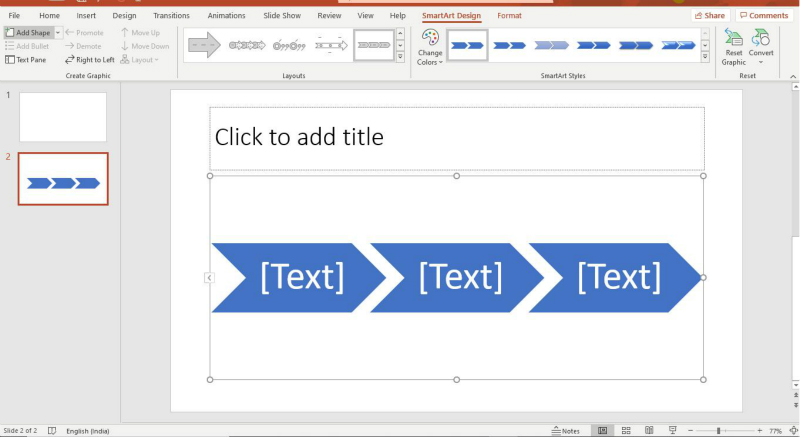
In the pop-up box on the left-hand side, select Process. It will show you all the graphical possibilities for a timeline. Depending on the sort of timeline, you can pick whatever timeline you want.
Source: PowerPoint
Step 5
Double-click the title field to add a title to the timeline. You can modify the font size or color in the column group and alter the paragraph section's text orientation.
Source: PowerPoint
Step 6
After you have made changes to create the timeline you require, you can easily save the timeline and export it as a presentation slide.
2. More Easier Way to Make A Timeline
Step 1
Open EdrawMind on your desktop or laptop, and select the vertical timeline, winding timeline or horizontal timeline.

Source: EdrawMind
Step 2
Add your text and use the wide range of symbols from the libraries available to create your timeline in EdrawMind.

Source: EdrawMind
Step 3
Once finished your timeline, you can export your work or directly show your work by using the presentation mode.

Source: EdrawMind
3. How To Export EdrawMind Timeline
After creating a timeline in EdrawMind, you can save the document by pressing Ctrl+S or by clicking the Save button in the upper right corner of the main toolbar.
You can also export the timeline as a PowerPoint file (.ppt) or other generic format files. Go to the File tab, press Export > Export to PowerPoint, and then EdrawMind can automatically upload and save your timeline to your device as a PPT.

Source: EdrawMind
It will be way faster and more comfortable for you to post and pass your timelines with someone else, even though they haven't used EdrawMind before.
4. Example of Timeline Made in EdrawMind
Source: EdrawMind
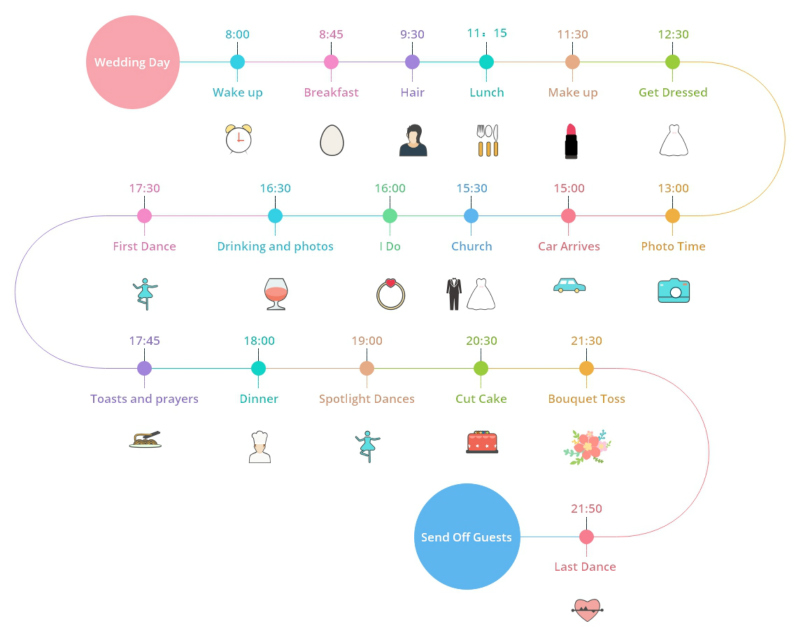
In this timeline example, you can see the arrangement of a wedding day. It shows the beginning of the day to the last dance and everything else in between. Usually, weddings are an extravagant event and require a lot of planning before the big day. A timeline like this can help you stay on track and ensure that all the arrangements have been made.
This example is divided into time slots beginning with waking up at 8 AM to later in the night till 10 PM. It is essential to stay on time on this day because every event happens after the previous one has been completed, and any delay can affect the entire event.
5. Key Takeaways
The timeline gives you an easily digestible, wide-ranging view of your project. Consolidate key dates in one place, help you visualize trends, and keep everyone on the same page.
To create the most effective timeline for your projects and process, consider using a tool that allows you to track, manage, and update timelines in real-time from anywhere. How to make a timeline in PowerPoint can be easily achieved through EdrawMind.
EdrawMind is a great tool to help you create visually appealing timelines. The reasons why choose EdrawMind are listed below.
- The software provides 12 different map types, 33 themes, and more than 700 clip art materials to design the timelines with almost unlimited possibilities. With the pre-made templates, the specialized map-making tool can help you quickly create your mind map and reduce the time required;
- EdrawMind gives you the flexibility of incorporating more detail, such as callouts, relationships, summaries, points, comments, and hyperlinks, to help you create amazing mind maps.

